Blog posts
Number 1
(July 4 2021)
About 10 or 12 years
ago, I started work on a book that was meant to help beginning students to
overcome common difficulties they were apt to encounter when learning to
draw. For various reasons I never finished the book but, with a few updates,
I do think the information could be of value. In that spirit I plan to
post excerpts from the book while emending and enhancing some of the ideas
along the way, which will lead to slight disparities between posts. This
shouldn't interfere with understanding the main concepts
presented.
The initial text was
titled Drawing: A Quick Approach to Gaining Professional Level Skill. As
I continued teaching, learning and ruminating on the drawing process, it
occurred to me that a new way of ordering the information I was presenting
might give fresh insight. So, in that spirit (again), I retitled the
book: "Learning to Draw; Seeing and the Three Kinds of
Memory". This didn't require me to drastically change the
information I was presenting, only to reorder it in what I think, is a more
logical sequence. By posting This material on the Blog I am hopping not
only to offer new insights, but to illicit feedback about the overall concept
and the usefulness of the ideas.
I'll start by posting my
initial Introduction and then add subsequent chapters, in the coming
weeks. I will be adding visual examples, many from my classes but some
from other (I assume) copywrite free sources.
Introduction
Why another book about
drawing? It’s a legitimate question, since there are already
hundreds of worthy books on the subject. Yet, in my experience of 35 years as a
professional artist and teacher, I have encountered too many talented, even
gifted, drawers/sketchers/artists who have struggled on as draftsmen despite
having read these books and having taken countless courses, seminars and
workshops. There are some very good books out there, of course; I have read
many of them myself and have even used some of their advice in my drawing
classes over the years. But, these books generally take many things
about new students for granted. They assume that the readers have
already acquired basic ways of looking at the world around them, and that
drawing is a straightforward matter of transferring what they see to paper.
What is missing from
most of the books out there is an explanation of why the drawings you make
don’t look like the author’s examples. Some books do give advice on
how to overcome common problems that are encountered, but the advice merely
suggests approaches but doesn’t explain why doing these things is
essential. They give advice that is either incomplete or so
expansive as to lose focus on the main issues.
I wrote this book to
help demystify and explain the initial stages of the drawing process so your
drawings will look like the examples. Comprehending
the artist’s approach to seeing and organizing space is crucial to making rapid
progress as a draftsman. Once the drawing student has mastered the basic seeing skills,
other areas like learning style and development of hand skills, will improve
rapidly. As the student becomes convinced that he (or she) is on the right
track, he will become doubly committed to mastering technique and will then
begin to advance even more quickly.
Teaching students to see
has become a primary goal of my teaching. The students I work with must prepare
for careers in applied art fields by developing professional-level drawing
skills within two short years, often while carrying a full course load.
Although this book was inspired by my work with these students, the approaches
and methods I explain here are applicable to anyone.
No book can teach you
how to draw. Not even this one. What this book can do, however, is
give you a set of tips and instructions to follow (along with a little
inspiration) so that you can teach yourself. The actual learning process, its
progress, rapidity and extent depend upon your own will and
commitment. If you are among the fortunate few who were born with a
pencil grafted to their arm, then no prompting by a book or instructor is
needed. However, if you are like most of us, and you have some basic talent but
know that you need to work on it, then a book like this one is a good next
{first} step.
The first four chapters
of this manual deal with seeing, developing essential
memories, improving eye/hand skills, and an approach to learning so
that your speed of progress is maximized. This part of the book specifically
describes the “seeing issue” and shows you a proven set of strategies to
overcome the mental conflicts that cause so much frustration for
students. Once you’ve mastered the seeing correctly, you
will learn ways to speed up the acquisition of the other skills you’ll need.
The last few chapters offer information to help you with specific drawing
issues, like the rules of light and shading technique-- ideas to accelerate
your progress toward developing a personal style. Many of the thoughts on style
are my personal observations, and students are referred to other volumes, which
I have listed in Appendix B, to further expand their knowledge of the subject.
Seeing (part 1)
“Learning To Draw: Seeing and the Three Kinds of Memory”. It has become apparent to me during my years
of teaching, that by naming and examining each element that goes into improving
drawing skill, I could make the undertaking less mysterious and more logically
accessible.
In my view (no pun intended),
accurate Seeing must be understood before the various memory elements the
student needs to acquire can be absorbed most effectively. We must describe each of the three areas of
memory briefly, because, one of the three, in particular, directly affect
Seeing (artistic seeing).
The Three
Kinds of Memory
1. Memory knowledge of what things look like. I refer to this type of memory as a Mental construct.
2.
Technique. This is acquired knowledge and memorized
processes which enable the artist to enhance the believability and reality of a
drawn object or scene
Both of these types of memories reside in the Left-brain memory storage bank.
3. Muscle memory. This is the kind of physical memory you acquire by repeating a physical process over and over. Think doing a one and a half flip off the high board, tying your shoe or simply dashing off your signature.
4.
Seeing (artistically) goes way
beyond the optical component of looking at things. Of even greater importance is how the
brain processes that visual input. And,
it is the functioning of our memories (Mental Constructs), that is so crucial
to the Seeing process
Often,
even drawing something again (and again) doesn’t achieve the desired result. This is because something happens when, as
untrained artists, we try to draw something accurately. It is at this stage that many people, who
want to learn to draw, become discouraged, assuming that they do not possess the
requisite “talent”. But the problem is
not with drawing ability; it is with “seeing” ability. If you separate out the
act of “seeing correctly,” and learn and understand its several basic precepts,
then your development of drawing skills and abilities proceeds at a much faster
pace. A corollary is that those who
try to bypass the seeing step or don’t fully integrate it into their approach
improve at a much slower rate. I
have encountered many people who, having not absorbed this fairly simple
concept, have wasted years, changed the course of careers even, to hide or
compensate for that fact. Proportional
and angular measuring ability, for example, is one of the major processes that
form the basis for artistic seeing yet I have had students who felt measuring
(see Chapter 2) wasn’t “artistic.” that it seemed too mechanical or slowed them
down.; but nothing is further from the truth.
After a very short learning period, measuring becomes a natural even
instinctive aid to seeing which expands your artistic capabilities. We’ll cover
measuring, in more detail, later.
Seeing an object, the way an
accomplished artist would see it is a skill that most of us must learn, and it
is not so much an extended learning process as just changing your notion of how
to look at things. This can take as
little as five minutes (for the student who is already aware of the seeing
problem or 6 months for the student who can’t seem to pry himself loose from
old habits. Some students figure it out
on their own -- these are the advanced students in every class. Yet, for most of us, artistic seeing ability
is annoyingly elusive. To understand it
we must first talk about human brain function and how perfectly legitimate
habits we develop for one kind of activity can thwart or hinder or ability to
undertake a different sort of activity.
Psychological research into brain function has
created a whole new understanding of our thought process. Art educators and in particular,
Artist/writer Betty Edwards, in her book Drawing On The Right Side Of The
Brain, have made it common parlance to talk about the human brain and
thought process in terms of right-brain and left-brain. Memory, stepwise logic, math and language
skills, and digging an existing hole deeper (getting a PhD for example) are all
predominantly left-brain functions, while perceiving relationships and
spatiality, proportional measuring, and digging several other holes in
different locations (that is, exploring seemingly unrelated options) are
predominantly controlled by the right hemisphere.
How can we tell that there are distinctly different thought processes
which act in different but harmonious and integrated ways to help us navigate
through our days?
Two examples come to mind:
n When
you are driving, have you ever been so lost in thought (left brain function)
that you have driven for two or three miles before realizing that you weren’t
paying attention to what you were doing?
If you have had that experience, and survived, what was it that
prevented you from crashing into a tree or rear-ending the car in front of you? Answer: the right side of your brain, which
deals primarily with spatial relationships.
While you were on autopilot, daydreaming, your right brain was doing the
steering, adjusting your foot on the gas, and so on.
n Another
example is the venerable vase face optical illusion. Most people who have taken an art course have
run across this example; however, what’s really happening in the drawing of the
vase face isn’t always fully explained beyond the gee-whiz effect of its visual
ambiguity. But, it is an excellent tool for explaining the separation of brain
function.
In the exercise,
the student is asked to draw the silhouette of a face (Example - 1), and
then to draw an opposing silhouette facing the original. Horizontal lines are added to the top and
bottom to complete the vase illusion (Example 2). The crux of the exercise is that the first
silhouette is drawn from memory (left-brain), while the facing silhouette
requires the student to measure distances and try to match the shapes in
reverse while at the same time positioning it in opposition to the first
(right-brain). Try drawing a couple of
these and attempt to get a feel for the two different brain functions at
work. The two parts of the vase-face
drawing exercise rely on totally different brain processes; one memory, the
other spatial organization. Keep in mind how much easier it was to draw the one
from memory (utilizing your pre-existing mental construct for the
silhouette of a face). If you are still not totally convinced, I have
another example coming up that should help.


Having established that there are
two interdependent brain functions that, work in concert to govern our
day-to-day activities, let’s see what effect that knowledge has on our ability
to draw.
For the most part, our bifurcated,
or split brain works exceedingly well; after all, it has evolved over countless
centuries to allow us to cope with an increasingly complex world. In recent times, due to the emphasis placed
on left-brain functions by our modern educational system, the left side of our
brains gets much more attention than the right.
In our Western culture, as we get beyond second or third grade, right
side brain activities often take a backseat to left side ones in the public education
system. Thus, instead of emphasizing
subjects like drawing, music, and art we require math, foreign language,
writing, sciences and other subjects that rely heavily upon logic and
memorization. Because of this, most people,
as they enter adolescence lose or begin to ignore right-brain functions that
seem irrelevant to us when we contemplate the likelihood of a career tied to
our skill at using our left brain.
So, if we assume
the Left side of the brain tends to be dominant, why is this a problem?
A.
Memory takeover
As a child you probably did a lot
of drawing. Then, at about age 10 or 11, art (that is, drawing), took a back
seat as you began to concentrate on learning math, English, history and other left-brain
dominant subjects. If you even had an art teacher at that age, it would have
been unusual if he or she were into teaching fundamental drawing skills. Art classes you had would probably have been
of the more general all-purpose variety, with exercises in color, craft
projects, or perhaps computer graphics. Eventually, you either quit drawing all
together or if you wanted to persist, you started your own program of
self-study that, perhaps, involved copying comics, or some other pop culture
imagery.
You may possess only the technical
skills and knowledge of a ten-year-old or you may have been memorizing Anime
imagery or copying Lord of the Rings fantasy drawings, but it is important to
understand, that whatever skill level you have attained, the left side of your
brain, specifically, the part that keeps track of visual memory, will be part
of the mix when you attempt to draw a 3D subject from life. We rely on memory; it is, in fact, a large
part of why we improve in our ability to depict something. Each time we carefully draw a subject we
accumulate more visual data which then informs our next rendition of that
subject or other similar subjects
The difficulty arises when we or any
individual, at any skill level, relies too heavily on current memory to deal with a new subject. Someone who has not drawn since the age of
ten, trying to draw a real 3D house, will dredge up their “ten-year old’s
mental image” of a house (because it is easier!) with predictable results. A more advanced student, who learned to draw by
copying fantasy characters, will have a better idea for drawing the house
(they’re stored memory will be better) but they will still embellish with the
stylistic conventions of the memorized imagery.
The single biggest impediment to being able
to draw what you see accurately is the tendency of your left-brain (the dominant
half) to interfere with or take over the drawing function.
Left-brain takeover is what happens when a drawing you’ve
started, suddenly begins to go wrong.
Remember the vase face and how much easier it was to draw the profile
from memory than it was to draw the second, opposing profile? Your brain’s dominant half wants to take over
the function of drawing for the same reason: because it is easier. Whenever you draw something, your left brain
will try to impose its memory of that
object, no matter how imperfect that memory is. So, right in the middle of your drawing,
without realizing it, you allow your remembered concept of the object to take
over and distort the actual rendition you are attempting.
Object memories can be child-like
symbol memories that you developed early in life, (like a football with a
circle in the middle for an eye) but did not flesh-out because you weren’t
“into” art. Or they can be the more elaborate memories of the stylized work you
copied from during a later stage of your development. The result is that rather than drawing an
accurate rendition of what you are seeing, you draw an approximation of what
you see because you lack a tactic to help you draw it accurately, and it’s
easier just to revert to stored memory
You need an “approach” to drawing from
life that doesn’t rely on currently held memories.
Next we’ll look at strategies you
can learn that will allow you to resolve perception issues that create
distortions and that will help you build better memories (more accurate mental
Constructs).
Seeing (part 2)
In part 1 we learned how memory
takeover could cause us to distort a
drawing we were trying to make of an actual 3D scene. Next, let’s examine the way in which an
untrained person looks at the world so that we can better understand why it is
so easy for memory takeover to occur and how we can deal with it.
B. Regular old looking
The human eye has a cone of focus of only about 6 degrees. This means that when you fix your gaze on something, you can only focus your eyes on objects within a range of three degrees on either side of the centerline of your visual field ( a wedge whose horizontal diameter is only about a twentieth of your approximately 120-degree total field of vision). Within that range, there is a very limited depth of field for human eyesight.

So, using example_5 let’s suppose you are looking out of your window.

As you look past the praying mantis
on the drapes you notice a squirrel stealing seed from the bird feeder in your
yard, and just beyond the squirrel, still within your sightline, is the chimney
of the house across the street, and beyond that are the distant mountain
peaks. If you move your sight line of
vision, to focus your attention on the praying mantis (it looks like it’s going
to jump on your sleeve!) (See example 5A)
you will notice that all other elements in your six degree field (squirrel,
chimney, mountains) have gone out of focus.
As you refocus on each of these 4 elements in turn (examples 5 B, C
and D ) each of the other three go out of focus. If your line of vision drifts right or left (or
up or down), you will notice that each of the aforementioned objects goes out
of focus as you zero in on something else.
Notice also that objects within our cone of focus but separated
significantly in depth are also out of focus when we hone in on one object. Yet except for the times when we’re doing
exercises like this, we never notice how much of our world is out of focus at
any one time; Nineteen twentieths to be more precise. This is because we construct, in our mind’s
eye, an in-focus universe by letting our eyes continuously dart around,
focusing on everything of importance that we encounter. This is regular old looking.
One of the dominant left--side
brain functions I mentioned earlier was stepwise logical progression. For example as a math student you would
logically progress from simple arithmetic to geometry, trigonometry, algebra,
differential equations and then calculus and beyond. As a child learning to read you would start
by learning the alphabet then progress to simple word/object associations and from
there to simple sentences, grammar and so on.
The ability to understand logical progression is obviously a valuable one
for humans but it can be an impediment when it comes to rendering an object accurately
from life (when seen in three dimensions), especially when we use regular old
looking to do it.
An example of the problems inherent
in regular old looking is in order. Let
us suppose that you are going to draw a group of objects scattered about on a
tabletop. (See example-6.)

Because of your eye’s narrow cone
of focus, you will tend to focus on each object individually, and the left side
of your brain will want to process information from one object to the next in a
logical progression. The result will be
that you draw each object in turn moving from the Basket, to the wine bottle,
and then to the file box (or in some similar fashion). But soon you will be running into trouble,
because in your drawing, the objects don’t want to line up the same way they do
on the tabletop, and some even seem to be the wrong size when compared to one
another on your paper, the spacing is all wrong and, besides that, the
cylindrical objects and boxes look distorted.
This happens because when you see and draw the objects individually
(cone of focus; regular old looking), you’re not paying attention to how they relate
to one another with respect to either size or position. This is the most common issue with learning
to draw from life: loving details applied to improperly sized and incorrectly
located pieces of the whole, whether it’s a still life, a landscape or the
human figure.
What if there was a way to get
everything properly sized and in its correct relative position before
drawing the details?
The
“logical” approach of drawing objects one after another does not work because
when you focus on each object separately, without consideration for the objects
around it, you build in errors of both size and relative position. Don’t
get me wrong, there is a logical approach, it’s just not the one based on
focusing on individual objects and drawing them piecemeal.
The reason so many beginning
drawings have these distortions is again, because as you focus in, the dominant
left-brain wants to take over the drawing, imposing your currently held mental
construct in place of what you are actually seeing and, treating each
object or part as if it were separate!
In other words, the left brain
doesn’t perceive objects, in a way that is conducive to helping you draw, until
you teach it a new logical progression.
Relationships


You
can’t see the details of any of the objects, but what you can see is their
relationships to one another (see example 10).
Using this information you can then “block in” that is, you can locate and estimate
the correct size of all the objects
Then using very light pencil lines, you can just put down estimates
of where everything is going to be positioned in the scene.
So

At this point, you could, for
example, hold up your paper and compare your light, “blocked in” sketch with
the actual scene---that’s why they invented the easel. Squint if you must, to soften the focus of the
three-dimensional scene so you can make the comparison. (see Example 11). The method of seeing everything as a first step is the reason that
experienced artists always seem to have all of the objects in their scenes in
the correct positions with the relative sizes correct. Once you have established the positions and
sizes of the objects, then proceed
to work on the individual parts just like the pros do.
A little practice seeing the three D space
flat and blocking in basic shapes will almost immediately begin to improve your
drawings.
So, adding the narrow cone of focus
stuff to step wise progression gives us “Regular old looking”, which along with
“Memory takeover” make up the two main impediments to seeing correctly. In the next installment we will look at the
ways to prevent or override the Left-brain tendency to interrupt and distort
our attempts at accurately depicting what we see.
In Seeing 1 and 2 we discovered that the way our brain is
wired can cause problems when we attempt to draw what we see accurately, and that
being able to see accurately is essential to improving our drawing skills
quickly. Below I have listed several
interrelated concepts that you can master in a very short time. Once these simple ideas are understood, the
perceptual difficulty of seeing can easily be overcome. I’ll list
them first and then we’ll take a closer look at each one.
Measuring relationships (three
kinds of measuring)
Measuring proportions, angles and vertical/horizontal relationships.
Treating Objects and Spaces Equally
Artists see the spaces between things
as well as the things themselves because on a flat surface both have equal
weight. You’ve heard the term “negative space”
referring to the space around objects. I
like to think of it in terms of “gaps,” or the spaces between objects
Seeing Flat
Seeing flat is the ability to see the relative sizes and spatial relationships
between multiple objects simultaneously. This ability comes from learning to
treat objects and the gaps between objects equally. Once mastered, it will be like having a
photograph of any scene you wish to draw, and thus the sizing and spacing of
the elements can be easily established.
This is the primary skill needed for seeing as an artist.
Other Kinds of Relationships
Once you begin to visually flatten
space, other kinds of relationships become apparent.
Lose Control Early to Gain Control Later
If you are very loose and light with the pencil to
begin with (blocking in with no details), it will pay big dividends with your
final drawing. This leads to a discussion of “touch.”
Avoiding Names for Objects
If we go with our instinct and think of what we are seeing by its object name (i.e. thigh, tree root, vase, etc.), our left brain will try to superimpose its stored symbol memory for the actual object. If we think of the thing we are seeing as a simplified geometric form rather than a named object, it is easier for our right brain to guide the drawing function, and we will get a more accurate drawing.
Measuring
I usually start a first class by explaining the separation
between the right and left brain and left-brain dominance, followed by an
exercise in which I have students draw a “vase face” to demonstrate how the
separation of brain function works [Seeing (part 1)]. Then, I put a plain cardboard box on the model
stand and tell students to make a line drawing of the box. Everyone can draw a box, right?
Most of the drawings look like some version of Example #12. (if they know a bit about Linear Perspective)

The student sees this (Example 13).

But, their previously held mental construct, causes them to make a drawing something like Example #12!
This happens because the typical, untrained student sees the
box in front of them and then unconsciously allows his left brain to
superimpose his previous memory of “a box” onto the drawing he is trying to
make. This causes the distortion.
The drawing becomes an interpretation of the student’s left-brain
“A Box” memory with its suggestion of dimensions even though the
student’s view of the actual box and its measurable dimensions
are quite different! In a left-brain
sense, this interpretation is a sound approach; the left brain carries logical,
manageable, simplified memories for everything—although most are not
specific. So, if the left brain takes
over, its interpretation of the object will show a logical understanding of its
properties, but not necessarily what it actually looks like in its current
position.

We will now look at the measuring process
Measuring Relationships
Measure Proportional Length/Width/Height
Let’s look at what has just happened and demonstrate something called “proportional and angular measuring.” We’ve all seen the picture of the “artist” (usually wearing a beret and sporting a pointy little mustache) holding his pencil at arm’s length and “artfully” sighting the subject of his drawing. What he’s doing is comparing the size of two objects in his line of sight; or, comparing the width of an object to its height; or, comparing the height or width of an object to the space between it and an adjacent object. Like this archetypal sketcher, you too can compare anything to anything using this method—and the beret and mustache are optional. Look at Example #15.

Notice that the artist is sighting between the top of the
pencil and his thumb where he’s grasped the pencil. Although many teachers suggest that you do
this with your arm fully extended, it’s not required. As long as the pencil
stays at the same distance from your eye when making the comparisons (between
two objects or object dimensions, etc.) the proportional relationship will be
correct. So, for example, you might
determine an object’s height is a little over twice its width or that the
object’s width is about a third the size of the gap between it and the next
object. This process of measuring sizes
and relationships is something your right brain does a lot better than your
left brain and by doing it, you’ll be ensuring that you are drawing the objects
in front of you and not substituting a left-brain mental construct. At first, for many students, this approach
seems not “artistic,” when in fact, learning to measure objects and distances
for yourself becomes routine, lets you see more quickly and clearly—and, in the
long run, increases your confidence as an artist and your ability to interpret
more “artistically.”
Measuring is probably the most
important and effective method you can use to prevent left-brain memory
takeover.
In the box example (Example #13), if
the student had made some simple measurements for locations of vertical corners
and related all the measurements to the height of the nearest vertical, then
the drawing would look more like Example 14.
Measure angles
You can also use the handheld pencil
to measure angles. Sight
align it with the angle you wish to duplicate, hold your drawing up and then
simply scribe the angle on your page while making a visual comparison with the
original angle you sighted (in the case of example 16, the roofline across the
street.)

When doing this kind of measuring
you should ensure that you keep your pencil vertical (perpendicular to your
line of sight) as there is a tendency to point your pencil in the direction of
a receding line you are trying to get the angle of. Just remember that the angles you measure
must be translated to a flat surface so your initial measurement should be made
with this in mind. Deborah Rockman in her book The Art of Teaching Drawing instructs
students to think of the pencil as a clock hand and estimate the time (3 o’clock
the small hand being horizontal.) You are translating three-dimensional
information to a two-dimensional surface and this is why you need the imaginary
flat surface, like a clock face, to reinforce the necessity that your pencil
remain perpendicular to your sight line during the angle measuring process, to ensure
an accurate translation of the 3D visual data to your 2D drawing surface.
Vertical and Horizontal relationships
A third use of the pencil for measuring is in sighting
vertical and horizontal relationships.
This is an aid to seeing relationships in a complex form (the human
figure) or group of objects, and helps us to position them correctly. (Examples
#19, 19a, 19b.)

Measuring By measuring angles,
proportions and vertical/horizontal relationships you avoid making errors caused by the tendency
to rely on faulty mental constructs. At
the same time, you are transferring an accurate, flattened view of 3-D
information onto a 2-D sheet of paper.
When students do the “draw the box”
exercise, it is amazing how many cannot see the correct version of the box
until they use the measuring technique to actually compare the dimensions –
by measuring, they are disproving their incorrect mental assumptions!
Objects
and spaces are of equal importance
Let’s revisit the bottle, the basket, and the box. (See
example #6)

In this example,
notice that there is a gap between the bottle and the basket and between the
bottle and the box. This gap is called
a negative space. As we have seen, the left-brain
cares about focusing on objects and lining them up in a logical progression. But it doesn’t care at all about empty
spaces. So, try this: draw the shape of
the space between the bottle and the
bowl. When you do this, you are seeing
both of the surrounding objects simultaneously and to do that are using the
right side of your brain. Because your
left brain has no ready-made symbolic memory available for a negative space,
and therefore cannot impose an image on your drawing. As a result, your rendering should be very
true to the actual shape and dimension of the space in between objects which
happens to be shaped exactly like the edges of the objects themselves.
Another way to understand this is by thinking about the “Gap” or space between two objects.

The only way you can perceive the size or shape of a space between two objects is by staring in the direction of the objects and not focusing on either object but rather allowing your peripheral vision to gage the distance between them! You didn’t focus on either object but allowed your mind to flatten the space enabling you to see the gap accurately. With a little practice it becomes easy for you to flip the mental switch, stare in a direction, out of focus and determine the correct relationships between multiple objects or elements of a scene and thus letting you
Seeing
Flat
When I use this term, I am referring to the acquired
ability to look at a three-dimensional scene and see its various components as
if they were on a flat surface (as though you were looking at a photographic
print of the scene). You will recall
that we have a very small cone of focus and that our visual depth of field is
very limited, so the untrained eye tends to focus on individual parts of a
scene (first the praying mantis, then the rooftop, then the mountains, and so on).
The artist’s eye can do that too, but the artist’s eye is also able to
look in the general direction of this group of objects (without focusing on any
single element) and see all three simultaneously! Of course, they will not all be in focus, in
fact, none of them will be in focus, (remember Example 10-11), but
in this case, they don’t need to be in focus because what the artist wants (at
least initially) is not a sharp image of any one object, but rather the size
and placement relationships among all the objects.

By looking at all the objects
simultaneously (focusing on none), the artist can see how far apart they are
(the Gaps) as well as the various linear and shape relationships that would
never be apparent by looking at the objects in focus and one at a time! This is why artists can draw a group of
objects in a still life and get them all the right size and in the correct
place.
And finally, remember the example of the roof line angle and
drawing pad? Take a look at example 16-17)
If you tried that and compared the roofline angle with the one you scribed on
the paper, then you were “seeing flat.”
The pad is three feet away, and the roofline is forty yards away. To be able to see them both simultaneously,
you had to look in the general direction, but not focus on either. In fact, if you compared the angle of your
drawn line with the angle of the mountainside you are comparing two things that
are forty miles apart (in depth)! Seeing
out of focus allows you to do this. The
dominant left-brain wants to focus on individual objects and proceed logically
from one to the next to the next . . . and in doing so prevents the right side
of your brain from seeing the “relationships” between things.
We’ll complete the list of Artistic Seeing aides in the next
installment.
Exercises
1. Draw some vase faces. Refer to the Examples 1 and 2 as you do it but imagine your own unique profile.
Draw the first part from memory, and then draw the second, facing
part. Think about the different process your
brain uses to draw each version of the facial silhouette.
2. Draw some gaps. Look at the shape of the space between two
buildings or objects and make a line drawing just of the gap or space between
them. In perceiving the gap you are
requiring yourself to see more than one object even while you’re seeing a
relationship between objects! A
relationship you might never have noticed before. Some call this negative space, which it is,
but I think the term “gap” helps you understand the concept on a more basic
level.
3.
Practice
proportional and angular measuring. To
get used to the idea, set up a chair in your room facing objects on the other
side. How wide is the bookcase when
compared to its height? The same? Three
quarters of the height? How far is the
wall clock from the window? Two times
the width (diameter) of the clock? And
so on . . . If you have trouble with the
pencil sighting just pinch the distance between your thumb and forefinger to
make the comparisons. With a bit of
practice this becomes a part of your approach to drawing a scene or objects.
Seeing (part 4)
Measuring, flattening space, and controlling left-brain
memories are essential skills, but several additional concepts can greatly
enhance your seeing capabilities.
Other
Kinds of Relationships
Once you have developed some skill
at seeing flat, other comparisons beyond simple spatial and size relationships
become possible. Parallel relationships
and lines that flow into other lines are examples.
It takes only a little
practice to develop the skill of seeing parallel relationships or lines that
extend into other lines once you understand the trick of perceiving gaps. Try this: Look for parallel lines that
stretch the limits of your perception. Take
Example 20. You could use the angle of the
student’s upper arm resting on the table. It happens to be parallel to the receding edge
of the desk beside him. And that, in
turn, is “lined up” with the lower edge of the box surrounding the shapes on
the dry erase board.

To help you understand
this you can make your own “relational” seeing exercises. Try looking for parallel curves or other
shapes that are similar to each other. (Look at Example 19 again and then look
at examples 20.5 and 20.6.)


So, you can begin to understand that flattening space
(mentally) not only helps us improve the accuracy of our pictures, it also
opens up other, more advanced ideas about the way in which we construct
them.
The possibilities are limitless. This ability to notice and apply a subtext of
consciously perceived relationships, which anyone can acquire with a little
practice and imagination, lies at the heart of compositional structure that one
discovers in the drawings and paintings of the Masters. See Examples 21, 22,
and 23.


By looking at a group of objects without focusing on any one object within
the group you can perceive relationships between objects, distances between
objects, size comparisons of objects, parallel relationships, and other spatial
information that is not available to you if you only let your left-brain take
over and focus on individual objects.
Lose
control early to gain control later
In my work with students, I have come to realize that in many
cases the problem of getting lost in the details of objects could be alleviated
by simply changing the way the pencil is held during the initial stages (the blocking-in
stages) of the drawing. Normally, whenever
you find yourself gripping a writing instrument (Example #30), you’re getting
ready to engage in some detail-oriented process like writing down a phone
number or doing a math problem. So, your mind is trained to start focusing from
the instant you pick up the pencil.
By gripping the pencil in a way that prevents you from
drawing details, you have immediately taken away the ability to be in control—which
can be scary. When I encourage students
to use a more relaxed grip as in Example 31, they are often uncomfortable at
first. They feel the loss of control. But, losing control is exactly what you should
do at the blocking-in stage of a
drawing. You are only interested in very
loosely and lightly sketching out the size and location relationships of the
objects anyway! So, holding the pencil loosely
will keep you out of the left-brain detail mode, and help you concentrate on
getting the relationships in the
drawing correct.

Example #30 Control position; working on
details

Example #31 Allow the pencil to float—holding it loosely
with thumb, index and middle fingers (not touching
the fleshy web between index finger and thumb).
This prevents you from focusing on details, which inevitably happens if
you are holding the pencil like an accountant (control mode, Example #30).
Remember, you only want to be setting up the image
by drawing “blob” shapes very lightly but in the correct spatial and size
relationships to the other “blob” designated objects. So, no details. Everything drawn very lightly. The advantage of this technique—blocking-in
marks drawn faintly—allows you to add the finishing details later
without having to erase.

Use the same process on any subject. Notice the torso of the nude is treated as a parallelogram. You can simplify the thigh jutting forward as
a plexiglass cylinder, correctly sized and placed to which you then add
details. See the next section.

Avoiding
names for objects
In this process of translating 3-D information into a 2-D representation of that information, the more you can objectify the things you are trying to depict, the more successful you will be. “Objectification,” in this context, is to see the object as a simple geometric shape. The blocking-in process uses this notion.
Look at the above example to see a problem that commonly
comes up for students when they are drawing from live models. A student, when confronted with a
foreshortened view of a portion of the body—the thigh for example—may have a
great deal of trouble trying to draw it correctly as seen. Here again, that old left-brain dominance is
the likely culprit. What may be happening is that the student’s left-brain has
a mental picture of a thigh which it tries to impose on the drawing. Since that mental picture has little to do
with the actual scene the student is observing, the result is usually a very
distorted or bent-down (differently angled) version of the thigh that has no
resemblance to the actual image. In
cases like this, I suggest the student try to visualize the thigh not as a
thigh but rather as a transparent section of Plexiglas pipe. (Plexiglas pipe is a good substitute in this
case. Since it’s a visually neutral
object, the student probably won’t have an existing mental picture of it.) On seeing a piece of pipe, the student only
needs to approximate the overlap between the openings at either end, and
then refine the thigh shape-contours to that construct. See Diagram F-1 and the "This, Not This" diagram
that follows.


The resulting drawing is close to the observed configuration
because the left-brain “thigh” memory wasn’t required to create it.
Converting familiar but difficult-to-draw objects into
simplified forms, takes away their name/memory relationship and makes them much easier
to draw correctly. This is closely
related to the concept of blocking in.
The main difference in this example is the addition of a 3-D component
that comes into play when the student visualizes both ends of the transparent
cylinder. Most blocking in needs only
flattened shapes to represent elements in the composition so that their
relative placement and size are initially established.
Summary
I cannot stress enough the need to be able to see correctly. If you bypass this step, it might derail all
your subsequent efforts at improving.
The next step for you as a student is to practice these
techniques for a week or two to ensure that you have mastered them and can use
them in your future drawing. To recap,
here’s what you should be working on:
·
Measuring
techniques: Sight with your pencil to
make relative size comparisons and to measure angles for translation to a flat
drawing surface
- Seeing flat, understand and use
gaps: Consciously visualize spaces
between objects—get used to the idea that spaces and objects are coequal
- Looking for relationships
between things: revisit Seeing (part two) “Relationships”
- Control the tendency for the
left side memories of things from taking over in the middle of a
drawing. Embrace “measuring” to
help you to avoid overreliance on existing memories
You have now reached an important plateau. You can correctly
draw what you see. This doesn’t mean
that every drawing will come out as you want it, but with your newly acquired
skills you will be able to identify and correct problems of spacing and
relative size in your drawings. Over
time, as you continue to draw, the number of corrections you have to make will
be fewer.
Once you understand the process of “artistic
seeing” you will be able to correct your own drawings and the progress you make
developing your skill should be much more rapid.
Next, the three kinds of memory.
Three Kinds
of Memory (part 1)
There are three kinds of memory you must develop to evolve as
an artist. Two of these are closely
interrelated and we will discuss them in this Section. The third area will be covered under the
broad umbrella of Technique in the next section. .
1.
1. Mental Constructs of things --A constant
upgrading of your understanding of what things look like; not just the surface
detail but the structural identity as well.
2. 2. Muscle memory—the constant translation of visual data, through the hand to the page, that, over time, trains the hand to better, more concise and descriptive marks.
Mental Constructs and Muscle Memory (are interconnected)
We just spent a whole section devising ways to keep our
memory from distorting our drawings, but that doesn’t mean that memory doesn’t
play a part in the drawing process.
Before we can properly understand the essential role of memory in
drawing realistically, we need, to understand how currently held memories, if
not regulated, can take over the drawing process. The act of drawing is a balancing act between
what you are seeing and what you have stored in your memory about the subject
of your drawing. When you begin to learn
to draw, you don’t have very good memories of what things look like and rely
mostly on symbolic or generic conceptualizations of those things, and if you
couple that with the tendency of the left side of your brain to take over the
drawing task (remember _Ch 2_), your results will most likely end up as a version of reality that
has been influenced by your imperfect symbol memories and thus does not look much like
the scene. It is at this initial stage
of the learning process that your capacity to see correctly will pay big
dividends because it is at this stage--when you do not have a very good handle
on your subjects--that you must try to expend extra effort to be accurate, that
is you must use the techniques of Chapter 2 to insure you are being accurate
and not succumbing to the tendency to allow the left brain to substitute
symbolic information for what is really in front of you. When you take this extra care you improve
upon your existing memory of that scene, and this upgraded or improved memory
will, in turn, improve any subsequent drawings you may make.
If you always make a
conscious effort to strive for accuracy when you draw, the knowledge that you
gain in the form of better mental constructs will help you to make an even
better drawing of any new subject.
These better
memories of things (everything!) come from drawing, lots and lots of drawing
and concentrating on accuracy. Let me
make an important distinction here. The
drawings that you make of things (especially things you are unfamiliar with)
are really to analyze those things, and this analysis only works effectively if
you have learned to “see” correctly and actually do a carefully accurate drawing of the
object in question. I’m not talking here
about an hour and a half of shaded and embellished rendering – although you can
do that if you wish - I just mean about five or ten minutes of solid structural
analysis in which you look at major (prominent?) details of form and include
them in the overall sketch. This careful
analysis is what builds substance into your memories of the stuff around
you. If a student doesn’t realize the
importance of taking this extra care, no matter how zealous his or her efforts,
a lot of the time will be wasted. Slow
down, and build your artistic abilities on a solid foundation of knowledge
especially if you are an “applied arts” artist who really needs to be able to
utilize and manipulate real world visual data.
Drawing
and Sketching
As a beginning artist you should be drawing all of the time,
drawing everything, utilizing your newly acquired visual skills to analyze the
world around you. When you are drawing
and sketching, you are usually on location and working at a moderate size, say between,
6 x8” and 11 x 14”. If you are in the beginning stages of learning to draw, I
recommend that you use pencils of medium grade (F, HB, B – primarily because
they hold a point longer, and are more forgiving for the artist who has not yet
developed control over pencil pressure [touch]). You should also carry an eraser. (Note: a good, economical and practical solution is using the Standard HB Ticonderoga brand pencil with an attached eraser) When you are drawing, you should not let
mistakes you notice when comparing your drawing to the scene you are working
from, pass; fix them, because you are
trying to train the right side of your brain to function properly, that is, to
add to and improve the visual data you have already stored, and, by allowing
mistakes to go uncorrected you diminish the effectiveness of that process.
Some
Practical tips: most
drawing books suggest that you do a simplified drawing of the object you are
going to sketch and then add the details.
So, to draw a fire hydrant for example, you would start with a vertical
cylinder, and so on…. This is a valid
suggestion as far as it goes but, what never was made clear to me (and which
took some time to realize) was that that first cylinder should be drawn very,
very lightly and loosely so that you can
visually compare your drawing to
the object to check that you have the overall proportions correct (see example 25
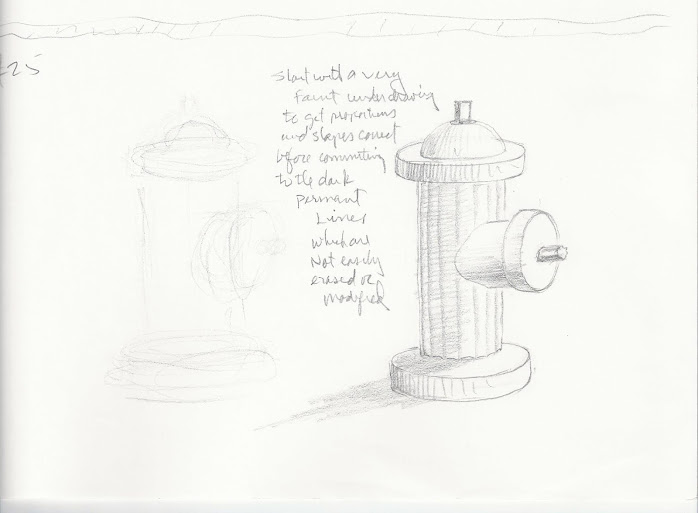
This will allow you to make adjustments to your drawing (also very lightly) before proceeding to the
bolder, finish lines. In the case of multiple objects (as is most often the case!) using this very light approach allows you to check relationships in size and position before proceeding to finish . (See Example #11 under "Relationships"). This way, you
haven’t committed to a bunch of dark, unfixable lines that are in error. Using especially soft pencils for this work
is also not advised since they are crumbly, messy and become dull very
quickly. Mistakes when erased tend to
smear, adding to the mess. Until your
hand skills and touch have improved, I advise you to use a selection of several
mid-grade pencils (B, HB, F) with 2 or 3
of each grade, all sharpened, to improve results.
Everything you draw with careful observation will become a
memory that will aid in subsequent efforts-- not only in subsequent live
drawings of other things, but in building your capacity to draw things from
memory. Let's call it increasing your "Imaginative Range".
Sketchbooks
and Visual Diaries
You should keep a Personal Visual Diary if you are serious
about becoming a visual artist of any consequence. It should be a personal record of your
artistic journey. It can contain your
thoughts, ideas, things you want never to forget, drawings, descriptions of
techniques, coffee cup stains, a visual record of the places you have been and
the ideas you have considered. In short,
it should be a reference book about you and for you. Even if you do not plan on becoming a pro, a
sketch/diary will still be important, not only as a reference to previous
insights but as an historical record of your artistic journey.
Sketch book diaries should probably be hard bound books or
the newer hard bound book with a spiral binder which lies flat for drawing and
should be regarded as an important personal document and treated that way.
Copying
and Close Scrutiny: Why and how to copy and
how it worked for me
“The masters must be
copied over and over again and it is only after proving yourself a good copyist
that you should reasonably be permitted to draw a radish from nature”.
Degas
Once you are convinced that having better (more accurate)
memories of the way things look will help you to draw them better, the next
step is the building up your store of memorized information. If, for example, we wish to become more
skillful at depicting the human form we can copy great drawings from the past,
not only to train our eye-hand skills but to increase our knowledge. Later, when we work from the live model we
can utilize knowledge and conventions we have acquired from close observational study (copying)
to help us produce better results. This
does not happen all at once, so we must be persistent, and approach each “copy”
as a valuable learning experience.
Analyzing and deconstructing the work of a great artist, if approached
properly, can be like “channeling” their
knowledge (a Master Class, if you will) from the distant past. At the
end of this chapter there are several copying exercises with a detailed
description of the approach to use.
The best way
to copy
Assuming we want to develop our knowledge (mental constructs)
of things, then it makes sense to copy versions of those things we want to know
more about. There are three main ways we
could undertake this process.
1. We could set up the object (s) on our desk and
draw from life, or
2. We could take a picture of the
object (s), print it out, and then use that “flattened’ version to do
our drawing. This would simplify our
task as it would make space and size relationships more readily apparent. Lumped into this flattened out versions
category would be magazine pictures, paintings, comic book illustrations, and
so on; just about anything we can get some sort of picture of. But, let’s say we want to maximize the amount
of knowledge we get from a copy. How about…
3. Copying a competent existing drawing of the object or objects we wish to develop knowledge of. Not only can you learn shape proportion and detail but also the kind of marks used (technique) to develop the drawing, (obviously when using this approach you are limited to the view of the object determined by the artist whose work you are copying).
There is no correct answer to “the best way to copy”. It, of course, depends on the draughtsman’s knowledge and skill level. But for beginning and intermediate level artists who are intent on improving their skills and knowledge, then I recommend copying existing work in the same or a similar medium.
I have a term I use called Close Scrutiny which I define as
the careful copying of works that are pertinent to your area of interest. Most serious books on developing drawing
skills advocate copying. It is not
enough to simply look longingly at work we admire. We must “get into it.” If you force yourself to struggle to
approximate the sorts of marks that are embodied in highly skilled work you
will, inevitably, absorb portions of that dearly acquired knowledge. I feel the
best way you can do this by trying to reproduce it in your own hand. If you wish to learn to play the guitar you
wouldn’t just study chord diagrams in a manual; you would actually try to
imitate and test these diagrams by working with the instrument, over, and over,
and over again. And if the first few
times you couldn’t get the fingering correct, you would persist until your
fingers and hands, “did what you wanted them to.” You could probably learn to play the guitar
without the manual and study of previous music, but it would be a much longer
process, and if you tried to learn the guitar without practicing fingering, you
would fail. In a like manner, you must
train your hands and enhance your memories if you wish to improve
drawing abilities.
When I was a student, in my rendering classes and mechanical drawing I was fine and did well because I could focus in (remember the 6 degree cone of focus?), but in the figure drawing classes there was that annoying 3D space and all that unfamiliar complex detail that I had no memorized conventions for, to contend with; I was lost. My drawings were never finished and the parts that were, always seemed distorted and incorrectly positioned. My first semester instructor was sympathetic but not that helpful, and I remember his rather unspecific suggestions that I “be looser” “draw faster” and “let it flow,” I was particularly distressed when he suggested I just “draw loose like Rembrandt,”. He didn’t know how to tell me what my problems were and although I improved, mainly because I was looking at other student’s drawings, my progress was frustratingly slow. ( Note: I realize now that this disconnect I was experiencing was due to my lack of understanding that I had to set up "relationships" before working on details See section on Relationships )
The next semester I started in the same funk though my new
instructor was more helpful with his suggestions “Look at negative spaces” (if
he had used the term gaps [under "Seeing" see "Objects and spaces are of equal importance"], I would
have caught on a lot faster), “Get your proportions correct” and “look for the
gesture”. Beyond that, my hand was
beginning to make better marks. He
suggested that I make some copies of some Master drawings and start looking at
anatomy (At the time there was no specific course in human anatomy). Well, I was so balled up in my classroom
inadequacies and with other courses that I didn’t pay much attention at the
time. But I determined that I would
stay in Providence that second summer and really work on my drawing. I recalled his suggestion that I copy some
Master drawings, and I asked him what artists he suggested. He said, “Pontormo
as a good place to start”, he also added
that starting to build a personal art library and getting an anatomy book would
be a good idea.
I found an old copy of an anatomy book by Jeno Barcsey in a
used bookstore. The models in the book
were strange looking, but the pencil renderings were spectacular. I wanted to be able to draw like that! Not knowing where else to start, I began to
copy the illustrations in the anatomy book; at first the individual bones and
later the muscles and muscle groups - copying them to learn about the shapes
but also to learn his rendering style. It
was one of those epiphanies I mentioned in the introduction when I realized
that if I used my rendering capabilities to copy drawings I admired that I
could really learn technique and anatomy at the same time! So I’m copying anatomy and I’m copying master
drawings and I’m attending the open summer session figure drawing classes, and
no one is telling me to draw faster or like Rembrandt! And this led to a couple of other
discoveries. First of all, that the way
anatomical details in the Master drawings were drawn, were conventions for drawing those same body parts when I got to the
live figure sessions. Now It Was
Beginning To Make Sense! Second,
this stuff I was making copies of was beginning to be embedded in my memory – I
was replacing my earlier inadequate memories with much more serviceable ones. To be sure, when I drew, these memories could
dominate if I let them, but by regulating or balancing the use of the good
memories with honest right-brain analysis of the current subject, I was on my
way to competency. It was only years
later, when I began teaching drawing myself, that I realized the richness of
content one could acquire in just one copy, if it were undertaken with the
correct approach.
In one seriously undertaken copy of a master drawing a student would be:
·
learning anatomy along with
·
conventions for anatomical parts (a knee from the front for example),
or a method for suggesting foliage.
·
The
Masters shading technique and edge handling and line quality. Copying these
subtleties of drawing are invaluable to building your own muscle memory and
understanding of technique.
·
The
nuance of the Masters compositional
structure, See the El Greco, Example .#80
·
While
improving the ability to use right side
measuring technique and seeing of relationships; You are comparing copy and
original side by side, and mistakes are easier to pick out than trying to
compare a drawing to a live, 3D situation.
·
Developing
the habit of accuracy; of recognizing and correcting mistakes –
The drawing doesn’t get up and move after twenty minutes plus the space is
conveniently flat all at the same time!
I should note here that the struggles I recount are primarily with the human figure and anatomy, but are equally applicable to any genre whether it be landscape, still life or any other form when drawing from life or copying.

So, as you can see, improving Mental Constructs and training
your hand to make better marks inevitably incorporates the development of Technique,
which we will cover in more detail next.
The Third kind of Memory Technique
So what is technique
and how do I get some?
Technique, as I define it is the accumulation and/or
evolution of knowledge that increases the artists illusionistic skills and
that, when coupled with physical adroitness, become manifest in an artist’s
work.
When you attempt to draw a picture of something you see, you
are creating a two dimensional illusion of
the subject. Learning how to create this
illusion is basically the learning of technique. A common misconception is that you can bypass
the learning to “see correctly” phase of learning if you have good
techniques. Nothing could be further
from the truth, and the lovingly rendered but grossly distorted images made by
earnest amateurs are testament to this fallacy.
Being able to “see” so that you can get the shapes and relationships in a scene to be correct (accurate) is the necessary foundation of a drawing but it is only that, the foundation. For the drawing to have life, you must learn technical skills. Just as a magician (illusionist) has a bag of tricks, the artist’s techniques are the tricks that create the illusion on the page. The more technique the artist learns, the greater the impact of the illusions he/she can create. This knowledge of technique resides in the memory bank along with all of those “better memories” artists pick up as they draw from life and make copies and as they repeat these techniques over and over again their hands are becoming more adept. Remember the drawings in the Barcsey anatomy book that I really liked, and remember that I realized I was learning Anatomy and technique when I copied them? This is the basis for my contention that an artist can make the most rapid progress learning to draw, the figure in particular, when they copy from the best (the Masters) in the same or a similar medium (see Section on copying, page x), because they are multi-tasking. A finished drawing can take many forms, from a quick gestural sketch to a highly finished, almost photographic, rendering which might take days or weeks to complete and in between there are countless intermediate variations based upon the artist’s skill/knowledge level and intent. See examples 37, 38 and 39 .

Though all of the drawings are very different, they all rely upon some basic
bits of artistic technique. Below is a list of some areas that one must gain
some knowledge in to develop technique.
n Rules of light and shadow – how light
effects basic volumetric shapes
n Basic Linear perspective - 1 and 2D, circle
in perspective, practical application - apparent horizon line
n Additional rules for creating depth
of space, overlap, size placement, atmospheric perspective
n Line quality variation and edge
handling - texture
n Shading technique – application of
tone to create the illusion of 3D form, rendering
n Advanced techniques
n Materials and media
In Appendix B, I list books that are among my
favorites and how I found them to be of value.
The list does not begin to be exhaustive, and I am sure many extremely
cogent and useful volumes exist that I know nothing about. I leave it to the ambitious student to ferret
out works that add to their information.
That being said, I don’t think this volume would be complete, if I did
not touch on each of these areas in the hope that ideas I have formed over the
years might add some unique, or at least thought provoking, ideas to the
drawing debate.
Rules of Light and Shadow
Every book you encounter on the subject of learning to draw
will show you the basic volumetric solids with tone applied to show the effect
of incident light. Because we see this so much, we have a
tendency (Left-brain tendency) to gloss over this as material we already
understand and don’t need to study. Yet
nothing could be further from the truth.
By copying - remember Close Scrutiny? -
good representations of these toned shapes and not all books on the
subject have “good” versions, you are committing to your memory bank vital
information that will help you to improve the look of everything you draw (Now
if you are using a dull, “gnawed by a beaver” 4B pencil on a 2 or 3” drawing I
can’t guarantee the results- use several pre sharpened HB or B pencils for best
results). A solid, fully internalized
understanding of the rules of light is essential if you want to make good
realistic drawings. I think of light in
three different ways.
n A naked bulb is referred to as a
Point source and its rays are radiating on all directions
n The Sun is also a point source but for us the Sun’s rays are considered parallel rays to one another. Why? See example 54 .
n Randomly scattered ambient
light. This is the kind of light you
might think of on a grey overcast day, where cast shadows are very faint or
non-existent.
For practical purposes, although there are differences in the
rendering of highlights and cast shadows on objects, Point source and Sun’s
rays act similarly, and randomly scattered ambient light doesn’t give us much
tonal variation to work with. Examples_55
and 56 show the application of simple shading to more complex objects. Remember, a drawing of an object is an
illusion, an avatar of the actual
object, and as such the illusion is subject to the artistic skills of the
draftsman. One of the things it took me
a while to catch on to back when I was making those “hit by a truck” drawings
of the figure was that if I tried to draw every nuance of shadow on the form
while I was still struggling with the shapes and relationships, I became
hopelessly lost and frustrated, and my figures appeared to have contracted some
sort of horribly disfiguring skin disease before they were hit by the truck. A
lot of this was due to my lack of touch
with the pencil, but mostly it was due to the misapprehension I had that I
should be including every subtle tone in my ½ hour or 20 minute drawing. What happens in practice, or at least it did
for me, finally, was to make up my own light source! So if I was confronted with a confusing or
non existent shadow /shade pattern, I concentrated on getting the form correct,
and when it came to shading I would assume the light was coming from say the
upper right and add shadow to the forms accordingly. This was possible because I had learned the
“Rules of light and Shadow.” See the diagram on p x . Remember, a drawing is an illusion, created
by you. You are not tied to a literal
translation of anything. Rather, you
weave a spell, part real, and part trickery (read here, learned technique), to
make the illusion complete.

When the light source
on a subject is confusing, create your own light source, once you have learned
the rules of light and shadow, of course.
Diagram 57 below shows the effect of parallel ray light
coming from the upper right on several basic volumetric shapes (simple
forms).

We see objects because part of the light, bouncing off of the
object’s surface is reflected to our eye.
The surface tonalities we perceive are a function of the surface
texture (rough, shiny, wet etc.),
object shape and quality of the incident
light. Some artist’s have become very
adept at describing not only surface qualities of objects but complex lighting
conditions as well. As a first step in
developing those more advanced skills you must learn how light hitting basic
three dimensional (3D) shapes behaves.
Basic 3D shapes are the cylinder, the sphere, the rectilinear solid and
the cone. Virtually all complex forms we
see, both natural and manmade can be approximated by one , a combination or a
variation on these simple shapes. It
might even be said that developing your ability to analyze complex shapes in
this way is an essential part of the Blocking
In concept described in The "Seeing" section.
You should know the rules embodied in this diagram backwards
and forwards. Practice drawing the forms
and trying the lighting from different directions. Learn how to draw cylinders, especially the
elliptical ends (see circle in perspective p__). Understand and use reflected or “wrap around”
light which allows you to separate on object from another. See examples 58
and 59 . When making
copies of master drawings, look for ones that pay particular attention to the
subtleties of light and shade used in their execution and learn from them. Robert Beverly Hale was a preeminent American
teacher of anatomy and one of his books, Drawing Lessons of the Great
Masters is a great resource not only
of drawing and rendering tips but also of Master Drawings suitable for copying.
Examples 60
and 61 are a good drawing exercise to practice the
application of light and shade. After you have completed them check your result
against mine in Appendix___ .
Application of tone
I was conflicted about whether to put this section before the
previous one on rules of light and shadow since they are so interrelated. I leave it to you to go back and apply
anything you might pick up here to previous concepts or exercises.
Many books on drawing lay out the basics of tone application
something like this:
n Continuous Tone
n Dots
n Cross hatching
n Scribble
These are among the most used ways of applying tone, but in reality tone can be applied in any way you chose or in any way your powers of invention come up with. Because, tone, no matter how it is applied, is the buildup of media on the ground or paper surface, and being able to modulate or control the lightness or darkness of the applied media (touch) determines the look of the resulting illusion.

Another consideration: in a drawing consisting of both contours and tone, if the contours are convincing (in figure drawing, if you know your anatomical shapes well) the tone application is secondary to the contour shapes see Example 66 .

I occasionally tell students that you can practically throw dog poop (very loose application of tone) at a drawing and it will work if the contours are correct.

I don’t recommend this as an approach, though I have seen some very successful drawings that used a very loose application of media but were structurally sound because of the knowledge of underlying form evident in the work. Larry Rivers, one of the major figures in the post AE* pop art scene of the late 20th century made some exquisite drawings which relied on smear erasures , left out details and “artful” messiness. See Example 67 .

Many of the early
masterworks which still exist were preliminary sketches for large scale
paintings, frescos and alter pieces. The
artists who made these pieces were most often schooled in an apprentice system
and learned to draw anatomy over periods of years. They were very knowledgeable, and their
drawings were often quickly done - the way you might sign your name – and the
incredible facility shown was deeply rooted in a profound understanding of the
human form. So, in many cases, their
application of tone, was just a quick shorthand delineation of the location of
shaded areas. We see this especially in
the loose application of a single pass of hatching marks running across the
form (laterally rather than longitudinally)
see Examples 68 and 69 .
Yet the illusion of solid form is uncanny, and this is why we can derive great
benefit from studying (read “copying” see Chapter 3 ) these works. An incredible book by Philip Rawson called Drawing,
Second Edition, has some very enlightening sections dealing with tone
application and contours. Jeno Barcsay,
in the Anatomy for the Artist I mentioned early on was a master of using
cross hatching and by its careful buildup producing continuous tone. See example 70 . [ add Cvardi]
Paul Calle an illustrator developed an incredible technique for application of tone
using pencils. See Example 71 .
Kathe Kollwitz, a modern 20th century master, made drawings
using broad chunks of a graphite or compressed charcoal stick which is another
variation on the application of tone.
See Example 72 . I have a
book by Saul Steinberg called The Inspector, and it contains some of the
most inventive uses of tone application I have ever encountered. See examples 73 and 74 .
This brings me to an important point that needs restating: knowledge of technique will greatly
enhance your artwork, but if the underlying shapes and relationships are not
correctly seen, then the final image will not be successful. We can make an analogy with contemporary
cinema, Let’s take knowledge of object
structure as “story line,” and applied tone technique as special effects. We have seen that if the story is weak to
begin with, no amount of special effects will improve the final result. Likewise, if we don’t have good knowledge of
the structures we are drawing, then the tone application, no matter how
impeccable or “slick” won’t save the drawing .
See Example 75 .
A couple of additional thoughts:
n Cross Hatching - because it is so prevalent as a technique, it
is worth the effort to gain competence.
I’ll offer some suggestions for those needing a baseline tone
application method but they are only for possible approaches; they are not
rules.
1.
Cross
hatch across the form see Example 76
2.
When
adding a second pass of hatch marks, maintain
the same pressure, change the angle only about 30 degrees not 90 and
shorten the stroke (see Example 77 ). [add a
77a]
3.
A
number of early artists used a curved hatch line which acted like a cross
contour line and helped define the volume of the form. Straight line hatches, when overlaid at ~30
degree angles create a modified curve which in its overall effect gives a sense
of volumetric curvature. See Examples 78
and 79 .
4.
Arthur
Guptill’s Book Freehand Drawing Self Taught shows exercises for making
hatch marks; work on those. See Example
34 on page___. The book itself has
additional plates which describe similar sorts of exercises that can be done
with different media.
n Smudging. Almost all of the smudging I see is used as a
crutch for people who have not or don’t want to develop the “touch skills” for
different kinds of tone application. I
have seen some great drawings that incorporated smudging, but I haven’t seen
any good drawings where smudging was the quick and dirty (no pun intended)
substitution for learning the artists craft.
Revisit the smudging option once you have mastered other approaches to
tone application.
n Rendering. Rendering, especially pencil rendering is
something I have some experience with, and I have included some of my thoughts
in Appendix___. Rendering as I have practiced it is the giving of photographic
realism to a scene. By that I mean, using the full range of tone fro black to
white, not allowing any hatching or pencil linesto be in evidence - there are
no pencil outlines in a rendering, rather, objects edges are defined by the
objects behind them. If you did a full
rendering of a scene it would begin to take on the look of a photograph which
has no pencil outlines. The full range
of tone is employed, and a consistent light source is adhered to See Examples___, ___ and___.
Line Quality and Edge Handling
During my final year
at art school, my teacher, Tom Sgorous who had given me good
advice about technique, had, unbeknownst to me, submitted on of my class
projects to the Society of Illustrators national student competition, and it
had been accepted!. Also that year I had
decided to see what an interview was like (this was before graduation) and had
taken my Portfolio into Boston for a couple of interviews. I had no luck at Houghten Mifflin, a text
book publisher, but at The Atlantic Monthly they gave me the job of
illustrating a piece of surreal short fiction
see example___. These early
successes led me to believe that finding work would be easy, this turned out
not to be the case. In 1974, a year out
of art school , I was living in NY just south of Canal street, overlooking the
dumpsters behind Pearl Paint artist supply co.
I was trying to sell Illustration, and was making appointments and
carting my portfolio all over Midtown Manhattan trying to get started as a free
lancer. I sold a few things, but my
actual rent money came from working in art supply stores and working part-time
for a guy who sold Plexiglas and other plastic stuff on Canal street and doing
grunt work setting up gallery shows in SoHo.
On my way back from an unsuccessful appointment one day I saw a flyer
advertising drawing lessons on Green
street in SoHo. I knew my drawing skills
left a lot to be desired (My drawing in the Society of Illustrators show had been
the worst one in terms of technique) so I decided to give it a try. It turned out to be a great class that went
way beyond the usual monitored figure sessions and was actually a proving
ground for some of the theories of the instructor, George Gillson. George was very interested in the abstract
properties of a drawing that enhance its spatiality or feeling of depth and a
large part of his interest dealt with the way edges are drawn. The course material of that course is not the
subject here, but my understanding of the importance and subtly of line quality
came from that course and is a large part of the reason I advocate copying
master drawings as close to the spirit of the original as possible. Look at examples a
and b (new) . The first copy done
as one might see it in say, Barnard Chaet’s The Art of Drawing helps
teach the student the flow and structure of the original, along with providing
a sense of communion with the artistic essence of the master, but, it is
usually done in the style and technique of the student. I want the student to experience all of the
above aspects of the copy but, in addition, I want them to start to learn the technique of the master as well. You can’t absorb the nuance of the way
something is drawn until you try to draw it yourself. This of course goes back to my admonishment
to learn not just one thing from your copying exercises but to learn several
things simultaneously!
Creating Depth
There are a number of rules for creating depth which one can learn to enumerate by looking at any manual of graphic design or basic drawing: overlap, higher in the frame = more distant, size relationships, rules of linear perspective and so on, and these are all things you should be aware of. Probably, for the draftsman though, atmospheric perspective is or can be the most exciting to use. Basically it is derived from the concept that more distant objects appear to be of lower contrast than closer objects because the intervening atmospheric dust and moisture particles reduce and scatter the reflected light more from these objects than from those closer at hand. The obvious example is of the receding landscape with the loss of contrast in each succeeding layer of hills and/or mountains see example 88 . An additional visual occurrence that we have gotten used to is the idea of focus in depth. Most of you have probably seen one of those artsy scenes in a movie were we have two subjects; one of the subjects, either near or far, is in focus, and the other is out of focus. As the dramatic action or dialogue shifts, the focus is reversed. This use of “in focus/out of focus” to create a visual focal point is one of those tricks in the artist’s bag. If you remember back, I said something to the effect that a drawing is an illusion created by the artist using various techniques and tricks. Well, using these notions that we have become accustomed to like atmospheric perspective and depth of field, an artist can force the viewer to look at a drawing or other work of art in very specific ways. See example 90

note how the background structures seem to be very reduced in detail almost enshrouded in fog even though they are only a few yards beyond the seated figure! Look at figures 91 and 92 and note how in each the idea of out of focus and atmospheric perspective force you to see the parts of the drawing the artist considered most important.
Another, more sophisticated, technique for creating space in
a drawing is the use of parallel relationships.
I call this more sophisticated because it relies on the abstract
structures within the drawing to intensify the spatiality. My NY teacher George Gillson first made me
aware of the powerful possibilities inherent in using parallels in my work and
of their presence in other artwork. His
book _______________ is listed in appendix B along with a brief description of
some of his potent ideas which include, but go well beyond, the use of parallel
relationships. Chapter 9 has a section
titled Hidden Geometry which is an except from a Power Point presentation I give to my
classes to demonstrate the widespread use of this device and other hidden
“subliminally suggestive” substructures
by master draftsmen of the past.
This subject, of hidden substructure, goes beyond those necessary skills
and techniques required of the novice, but the ability of artists to “See”
beyond the surface details we, as laymen, take for granted, and even most
artists don’t bother to notice has largely been lost. Early artists, who became the “Masters” we
admire, spent so much of their lives observing and refining their skills that
“just to draw the figure again” with an unsurpassed technical skill could have
become boring if there hadn’t been More. This is all supposition, but that “more”
became the integration of figure with ground using Parallel relationships, the
imposition of hidden graphic symbols, and many other probably some as yet
undiscovered mental gymnastics to enliven the process. See example___. Poussin often used the ellipse, which is
nothing more then a circle laying down in perspective, to integrate his figures
but also to add an increased sense of depth to his work. Note that the parts of the composition on the
“back edge of the ellipse are no farther away pictorially than those on the
bottom edge yet our subliminal awareness of the ellipse implies the circle
laying flat and seen in perspective! As
you develop your skills of seeing flat, you will begin to notice these abstract
kinds of relationships for yourself.
Example 94 .The Magritte is a fanciful depiction of these sorts
of illusions.
Some thoughts on Perspective
Every visual artist who wants to gain proficiency with drawing should own at least one book which explains basic perspective. I taught perspective for a couple of years when I was living near Boston in the 1980’s. and so I have a pretty good understanding of the basic precepts. See example 95 .

But, this book is not about how perspective works, it’s about how a knowledge of perspective can be useful to you. Understanding perspective allows you to manipulate perspective in a creative way. Our world is filled with variations on the rectilinear solid (there aren’t that many actual cubes). We are surrounded by them. Some are bigger than we are, like hotels and refrigerator cartons, some smaller like copier paper boxes. Most are not pure rectilinear solids but can be approximated with them, so a facility with drawing them is useful, as a way of simplifying shapes when we are drawing things. In a like manner, we have lots of cylinders, the ends of which are ellipses. A lack of the knowledge of rules of perspective that govern the drawing of these objects is immediately apparent, no matter how good someone might be at shading (remember the analogy of the film story? And the “Hit by a Truck” syndrome?). Most books which seriously undertake to be a complete compendium of the art of drawing have a component dealing with perspective. Two that are particularly good at not only introducing the basics of perspective, but showing how understanding perspective helps in the drawing process are: Drawing Space, Form, and Expression 3rd. ed. By Wayne Enstice and Melody Peters, and A Guide to Drawing Daniel Mendelowitz and Duane Wakehan. Deborah Rockman’s Book The Art of Teaching Drawing has a fairly extensive section devoted to perspective, which might be more suitable for instructors but this does not diminish its usefulness to the interested student.
Why it Helps
Many beginners, introduced to perspective, treat it as an
isolated visual phenomena which is interesting but not that relevant to
developing their “seeing” capacities and all the drawings they have to make in
building better mental constructs. But
actually, when integrated into your approach it greatly enhances or supports
your “seeing “ capabilities. Remember
the box drawings Examples 13 and 14 ? If you have spent a little time
drawing two point perspective boxes and have absorbed the concept that the
relationship between eye level and the Horizon Line determines the
characteristics of the object you are drawing, then you would be very less apt
to make the common mistakes like the one that shows up in example 12
. For a box that is below the EL = HL
but is close to it, the top is just a thin sliver, not a Left side induced
symbol box as in example 12. So,
with this example, we see that the Left Side memory knowledge that we acquire
by just playing with this simple concept dramatically alters our approach to
drawing a basic shape. Every bit of
perspective that we absorb will, when applied, improve the way we approach the
drawings we make.
Ellipses
I have mentioned ellipses before, but because it is such a
pervasive shape and seems to be so often misunderstood or misrepresented, I
think a couple of concepts should be emphasized:
n An ellipse is a circle, in
perspective see example___. You need not
know the logic of foreshortening as it pertains to the circle/ellipse (though a
very good explanation can be found in Drawing Space, Form and Expression)
but it is important to understand that an ellipse is a continuous curved
surface and does not abruptly change direction
See Examples ___ and ___. So when
drawing a cylindrical shape (in fact, any conceptual underlying shape [Blocking
In]) you should imagine it as transparent (as though it were a clear Plexiglas
tube) and draw your elliptical end shapes complete. See Diagram F-1 under "Seeing" p __ A very useful book for those particularly
interested in the figure, but more generally for anyone who wants to see how a
modern master simplifies form using basic shapes (including cylinders with
“good” ellipses) is Drawing Manual by Glenn Vilppu.
n When drawing an ellipse no matter how
large or small, use your whole arm, swinging from the shoulder and elbow. Also use your developing sense of “touch” to
draw several passes, very lightly and
“home in” on the shape you want to achieve.
You will be able to pick out the best shape from the variations (your
Right brain tends to want to see regular order) and then darken this part see Example_80 [ 3 part sequence].
n Try drawing a transparent, circular waste basket in which the bottom of the basket, because it is father below the HL = EL is a fatter (larger minor axis) ellipse than the top opening. See example___. In example ___, which S shaped curve will make a river appear to be receding into the distance? Do you see why we call it a circle in perspective?

Shadows
Cast shadows which are an optional addition to a drawing can be very off-putting and detrimental to the finished piece if they indicate a lack of knowledge on the part of the artist. They are not always a necessary part of a drawing, but in some instances can be a very powerful addition to a work. See example_# 108, in which the shadow patterns are a vital, integral part of Sheeler’s imagery.

Sheeler’s shadows were probably based on observation, but an understanding of how the laws of perspective can allow an artist to create perfectly convincing cast shadows from memory is just one more “technique” that can become part of your repertoire.
-------------------------------------------------------------------
No comments:
Post a Comment